
HUSH Roblox Kestrel Airfield nightmare supply drops Guide
HUSH Roblox Kestrel Airfield nightmare supply drops require handling high-threat loot zones within a strict 25-minute raid timer. Surviving means securing high-tier items directly into your secure case, avoiding sound triggers, and reaching an extraction route before blind infected swarm your position.
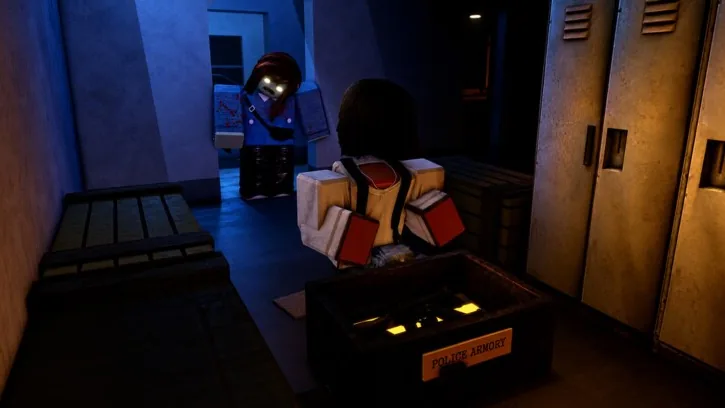
HUSH Roblox Kestrel Airfield nightmare supply drops require handling high-threat loot zones within a strict 25-minute raid timer. Surviving means securing high-tier items directly into your secure case, avoiding sound triggers, and reaching an extraction route before blind infected swarm your position.
Nightmare Parameters on Kestrel Field
Blue Code Studios structured HUSH [Zombie Extraction] around pure PvE mechanics. In standard deployments, survivors face shorter timers, but Nightmare difficulty extends the deployment clock to exactly 25 minutes. Raids support solo survivors or squads of up to four teammates, accommodating up to 12 players across the instance.
Deploying onto Kestrel Field on Nightmare tier introduces higher risks than Normal or Hard modes. While the map layout provides open sightlines across runways and tarmac buildings, infected patrol paths concentrate heavily around supply drop points and interior structures. Reviewing the Kestrel Airfield map guide helps squads coordinate routes before stepping onto the tarmac.
Because the infected cannot see, sound determines your exposure. Running across tarmac, sprinting near metal hangars, or firing unsilenced weapons immediately redirects nearby threats toward your exact coordinates.
Managing Supply Drop Containers and Grid Inventory
Looting supply crates and military containers under Nightmare conditions requires strict inventory discipline. Survivors utilize a grid inventory system where space is constrained by container dimensions. A basic Hiking Backpack provides 20 cells in a 4x5 grid, whereas tactical gear like the Rifleman Rig offers 12 cells.
Transferring loot quickly remains critical when clearing drop zones. Holding Ctrl and left-clicking moves discovered supplies directly into your bag without manually dragging icons. Surviving squads prioritize what enters their secure storage versus standard bag slots. Any item outside the secure container is permanently lost if an infected strike takes your life during the raid.
| Loot Category | Raid Role | Capacity Cost |
|---|---|---|
| Secure Case Reserves | Protects high-value items like antivirals and rare keys upon death | Restricted to 12 cells with the 3x4 case or standard pouch space |
| Field Weapons | Upgrades firepower with firearms such as the MK5 submachine gun | Occupies primary weapon slots or large multi-cell grid sections |
| Medical Supplies | Recovers health and clears infection using bandages and antivirals | Consumes individual cells that compete with extractable barter goods |
Following an extraction, sorting items between character inventory and your hideout stash preserves equipment for future sorties. Implementing structured stash management prevents losing rare gear between consecutive runs.
Sound Discipline Around High-Value Drops
Every supply drop location on Kestrel Field features infected clusters. The official game rules emphasize that every gunshot rings the dinner bell for nearby hostiles. Stillwater and Kestrel Field feature multiple enemy classes:
- Blind Listeners that react aggressively to footsteps and door movements.
- Runners capable of closing open field distances rapidly once alerted.
- Brutes and shielded Riot cops that absorb heavy damage.
- Screamers and pager Ringers that broadcast alarms across the sector.
- Map bosses that patrol specialized strongholds.
Relying on melee weapons like the crowbar allows survivors to dispatch stray infected or shatter windows quietly. When clearing tight drop rooms, closing doors behind you blocks sound travel and slows chasing infected. If a firearm becomes necessary to survive an ambush, equip options from the weapons guide and immediately relocate to prevent being cornered.
Extracting with Airfield Loot
The 25-minute Nightmare timer dictates every decision on Kestrel Field. Supply drop crates often yield valuable recovery goods, weapons, and medical staples such as Cold Cola for stamina recovery and antivirals to halt infection timers. Detailed planning in our nightmare looting guide outlines which items trade for maximum returns back at the trader hub.
Once your pack is filled, locate active extraction paths early. Exits demand either waiting out a timed zone, deploying consumable items like signal flares, or spending accumulated cash. Pushing for one extra supply drop during the final minutes of a Nightmare timer regularly results in getting cut off by patrols, wiping out every uncontained item gathered during the run.
Related Guides
Nightmare Police Armory Loot
Learn how to find the Police Armory cage, gather weapon crates on Nightmare difficulty, and reach an extract with your loot.
Hollow Keycards
Find every keycard spawn in The Hollow, unlock restricted research offices, and reach locked extraction routes during your underground raids.